

Contents of this page may be automatically translated, we take no responsibility for the accuracy of the translation. Feel free to contact our customer support centre if you have any questions.
Here you can find help and tips as well as descriptions of functions in the My Map app for Android. The help section is updated for version 1.12.0 of the app.
Icon Features
| Name of Feature | Icon | Description |
|---|---|---|
| Menu |  |
Show / hide more features. |
| Search |  |
Make a search to find the right spot on the map by writing in the text box at the bottom. |
| Switch map layer |  |
Choose background. |
| Mark my position |  |
Show my position on the map. |
| Feature | Finger Movement |
|---|---|
Panoramic view |
Press a fingertip onto the map and start swiping with your finger to move around in the map image. |
| Zoom in | Press two fingertips onto the map and pull your fingers apart to zoom in. You can also press twice in quick succession with one finger. |
| Zoom out | Press two fingertips onto the map and drag your fingers towards each other to zoom out. You can also press with two fingertips at the same time. |
| Show information about a place | Make a quick press with your fingertip anywhere on the map to open a box with information about the place. Make a quick press again anywhere on the map image to close the box. |
| Mark place | Press with your fingertip anywhere on the map and hold it there to create a mark on the map and save this in the menu My Places. |
Find on the map
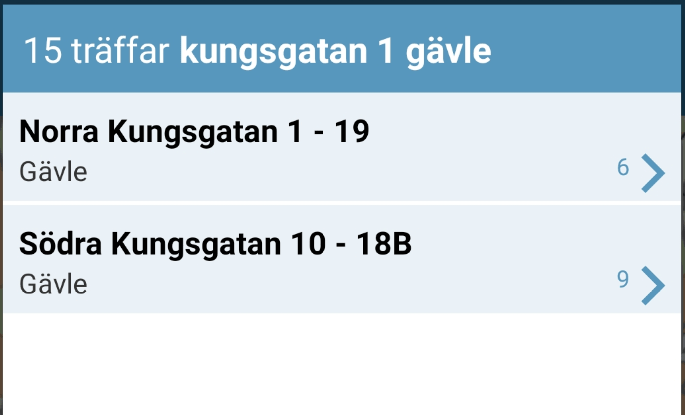
Make a search to find the right place on the map by writing in the text box at the top right. You can search for places, property unit designations, addresses and / or coordinates.
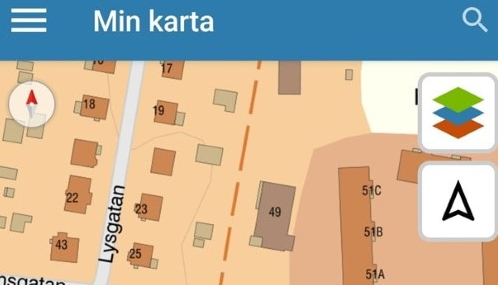
Your search results are displayed as a list and if you tap on a result in the list, you are taken to that place on the map and this place is marked with a blue map pin.
If you get a lot of hits when you search, try to enter the municipality or postal address, number of the street or the property.
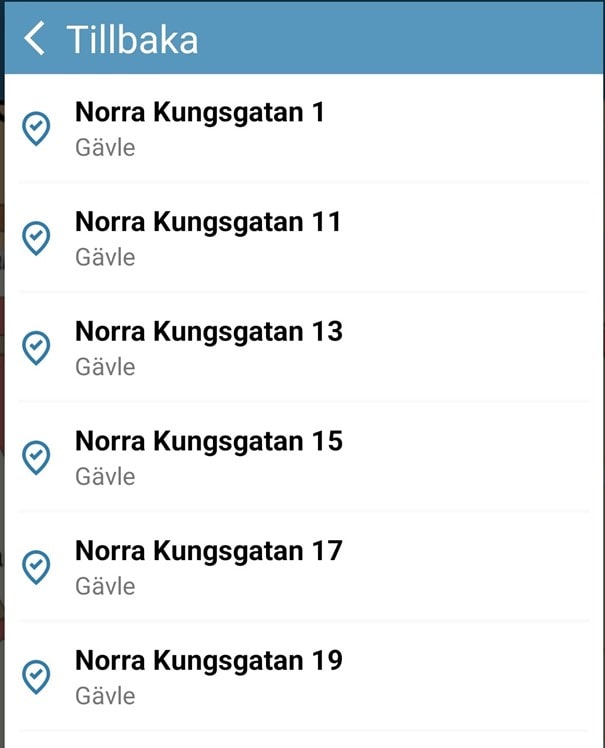
If there are many search results similar to the one you searched for, the search results are grouped into subcategories.
Tap on a category to unfold it and see the hits that are in that group.
Searching with coordinates
You can search on the map by entering coordinate pairs. If you have entered your coordinate pair according to the correct format and within our permitted range, you will be taken directly to the specified location on the map image, and this will be marked with a blue map pin. In My Map you have the option to enter coordinates according to WGS 84 or SWEREF 99 TM.
WGS 84
You can only search within the intervals Lat 55-70 & Long 10.5-24.5. Separate the coordinate pairs with a space. Use a period as decimal point. The correct format for a search with WGS 84 is for example: 55 12.1.
SWEREF 99 TM
You can only search within the range N 6105000-7794100 & E 213000-861000. Separate the coordinate pairs with spaces. The correct format for a search with SWEREF 99 TM is for example: 6500600 503000.
In-depth Descriptions of the Icon Features
Show My Location on the Map
When you activate this feature, your position is shown with a marker on the map, provided you have allowed the app to use your device's GPS signal. The position is updated every few seconds.
Keep in mind that if you use the app on a tablet and are connected to a network, the position may show errors if the network has a station elsewhere. Few tablets send their own GPS signal, and your location is therefore determined by your nearest network point.

When you have activated the function, the arrow turns blue. This means that the follow mode is activated. The follow mode is switched off automatically if you move the map image. As long as the follow mode is on, the map image moves as your position changes, so that your selection remains centered.

If you press the positioning arrow one more time, the map image rotates in step with your movements and a compass points out the direction to the north. This follow mode is also switched off automatically if you move the map image.

If you have had this follow mode activated and want to reset the map image so that texts such as street names and house numbers are the right way round, you just need to press the compass on the top left of the screen.
Select background
Here you can switch the background between:
- Property map – Topographical web map with property classification
- Map – represented by our Topographic web map
- Bergodal map – our Topographic web map combined with an elevation model illuminated with simulated lighting
- Bergodal map with boundaries - Bergodal map with property division
- Aerial image - true-to-scale, composite aerial photographs, so-called orthophotos
- Aerial view with boundaries – Aerial view with property division
- Aerial photo about 1960 - older aerial photos all over the country. Photographed over several years around 1960
- Aerial photo about 1975 - older aerial photos. Photographed over several years around 1970
- Terrain Shading – an elevation model illuminated with simulated lighting to show terrain

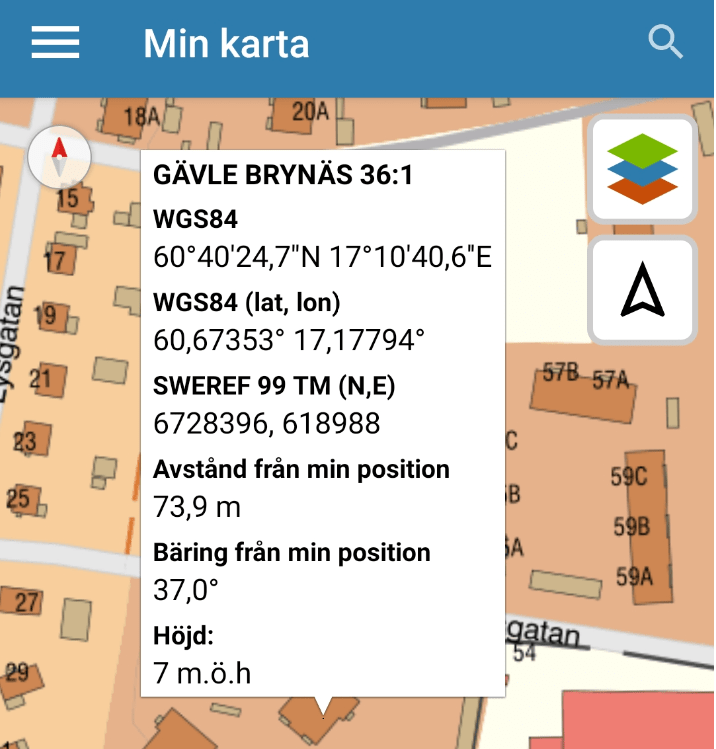
Tap on the map to display information about a location
Make a short tap with your fingertip anywhere on the map to open a box and bring up the following information about a location:
- Property designation.
- Coordinates in WGS 84 and SWEREF 99 TM formats.
- Distance from your position (in meters rounded to one decimal place).
- Bearing from your position (bearing indicates the angle of the location relative to your position, relative to the North Pole. The bearing is given in 360 ° rotation).
- Height in meters.
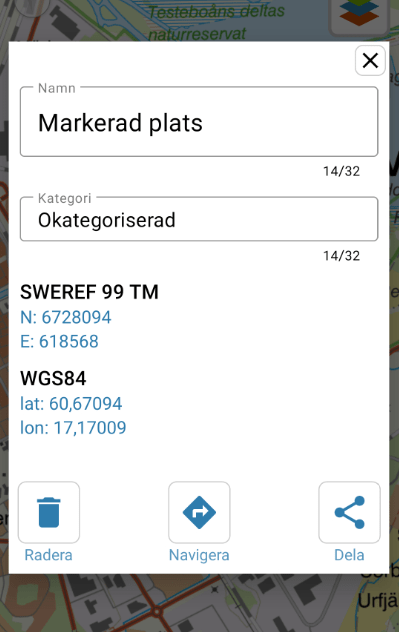
Select and save a location
Long press anywhere on the map with your fingertip to place a marker and save it under My Places. You have the option to name the place and assign it a category. If you choose to neither name nor categorize the place, it is saved with the name "Marked place" under the category "Uncategorized".
Navigate to marked location
If you choose to navigate to a marked location, you are offered to leave the app and instead be navigated to the location using the navigation app that is set by default on your device. Min Karta does not have its own navigation function and one will not be developed either.
Share a selected location with someone else
When you find a place or area you want to share with someone else, press the button to copy link.
The link you get can then be sent in any way you like.The link tries to open the map with the same area and zoom level as you selected, but this may work differently depending on how you send the link. Apps such as Messenger, for example, handle links in ways that may affect how the map is presented.
The link can also be opened on My Map for iOS and in the web-based version of My Map.

Additional Menu Options
Click on the menu button in the top left to access additional features.

My Places
Here you can navigate to the marked places you have previously saved by selecting from a list sorted alphabetically by category.

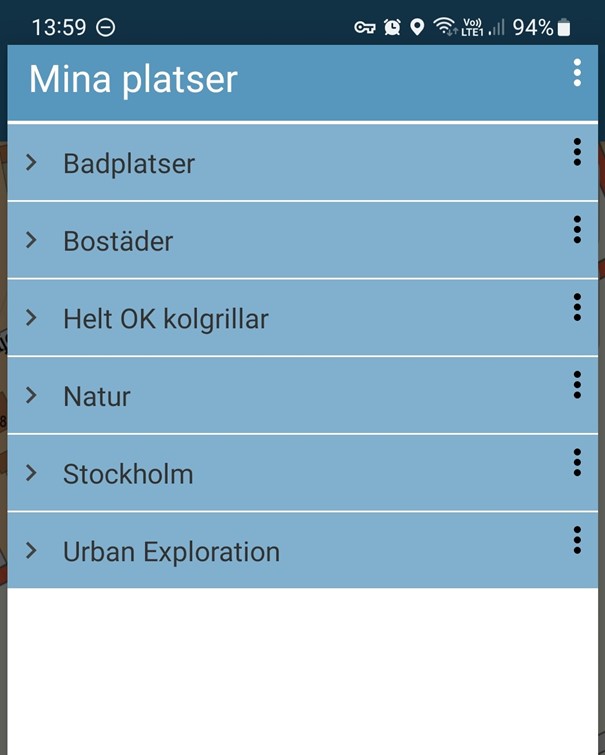
The categories that appear are those that you yourself chose to name when you saved marked places. The category named "Uncategorized" contains all places for which you have not specified a category.
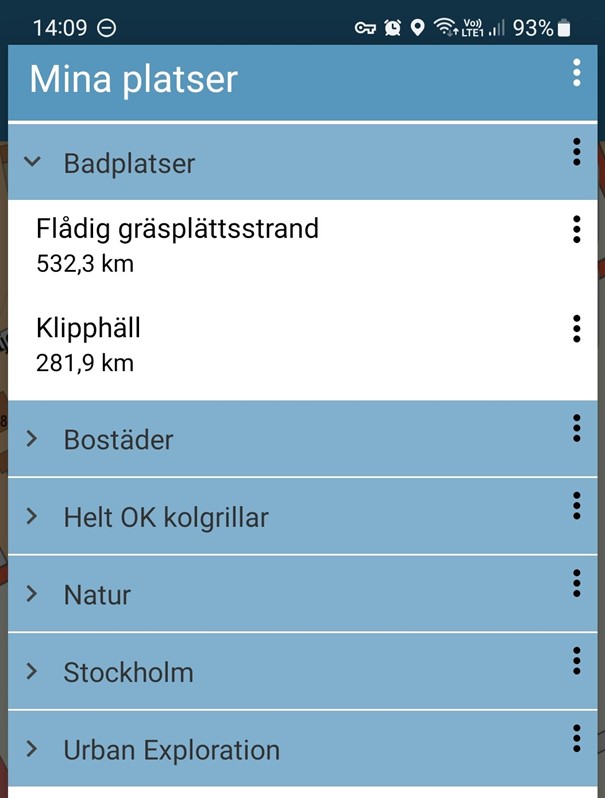
Tap a category to drop down the list containing the locations you've saved, then tap a row to display the selected location on the map. At each saved location, the current distance to the location from your current position is indicated.
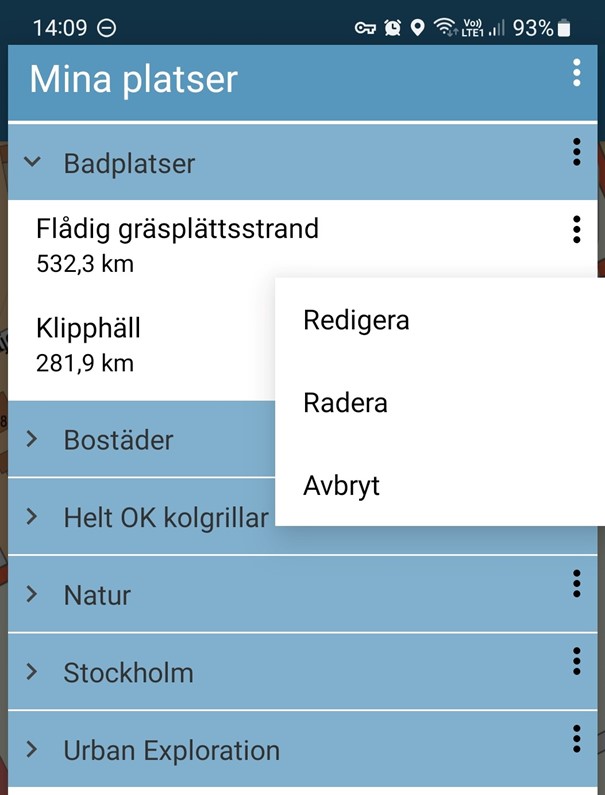
If you press the menu button at the far right of a category or a place, you get the option to edit or delete it. If you choose to delete a category, you also delete all saved places that fit within the category.
![]()
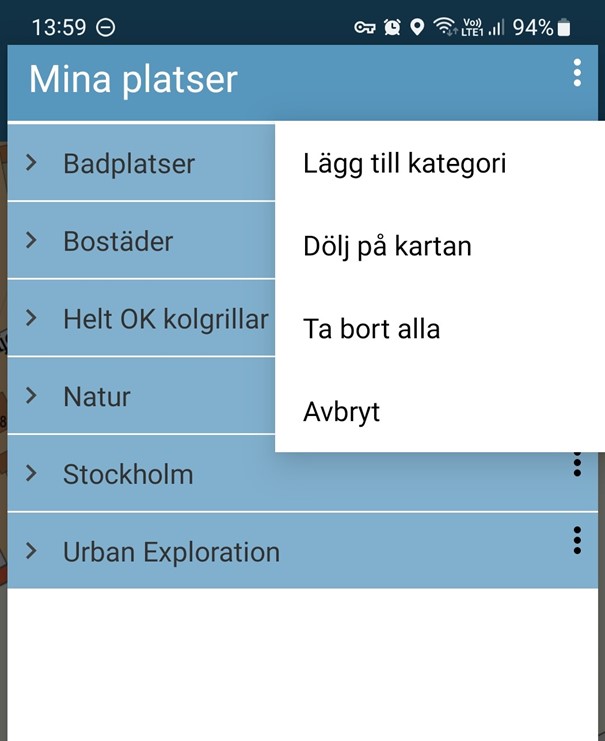
If you press the menu button at the top right, you get the option to add a new category, hide all markings on the map or show them again if you previously chose to hide them. You can also clean up your saved locations by deleting them all at once. There is no way to recreate your lists if you choose to do this.
Backing up My Places
If you have activated backup via, for example, Samsung Cloud or Google Drive in your Android device, your list of marked locations will be saved and will remain when you reinstall My Map.
If you accidentally delete one or more bookmarked locations or experience a bug and need to recreate your list of bookmarked locations, you can reinstall My Map from the Google Play Store to restore your list to the way it was at the time of your latest backup.
Measure on the Map
You have the option to measure both distance and area on the map. Here the different measurement features are described.

| Feature name | Icon | Description |
|---|---|---|
| Ruler |  |
Measure a distance between at least two points. Tap once on the map where you want to start and tap more times to add additional points. Finish with a long click where you want to place your endpoint. |
| Elevation profile | 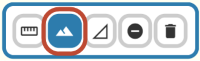 |
Click on the tool Elevation profile and then press on an existing measuring line on the map image to highlight it, the elevation variation will then be displayed on a graph. If you follow the contour line on the graph you can see where you are on the map’s measuring line. The longest line you can get is over 62 km. |
| Area | 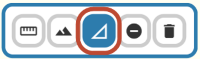 |
Measure an area on the map. You must have at least three points. Finish by making a long click. |
| Minus | 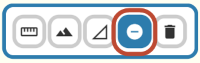 |
Delete a single line or area. First select the tool and then click on the line or area you want to delete. |
| Trash can | 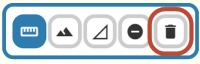 |
Delete all lines and areas. |
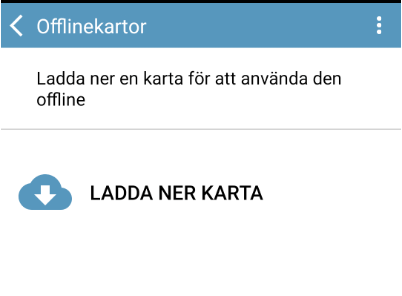
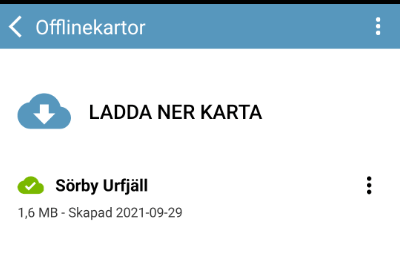
Offline maps
We offer the possibility to download a selected area of our topographical map to use offline.
It is only the map layer called "Map" in the map selector that can is downloaded for offline use and you then get information in the layers down to the scale of 1:50,000.
So you don't get quite as much detail at the deepest zoom levels as you get when you look at the map in its normal mode.
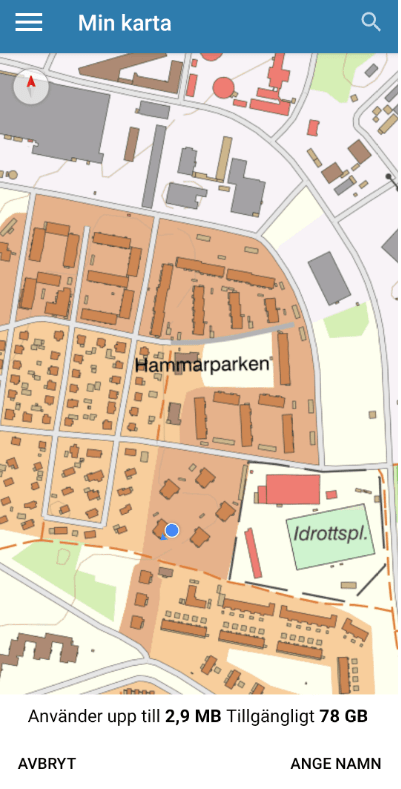
After you have chosen to download a map for offline use, the map image is displayed and you can pan and zoom to show the area you wish to download a map of.
At the bottom of the map image, you can see a rough estimate of the space the material will take up on your device. There is no option to save the offline map on an SD card, but only in the device's own memory.

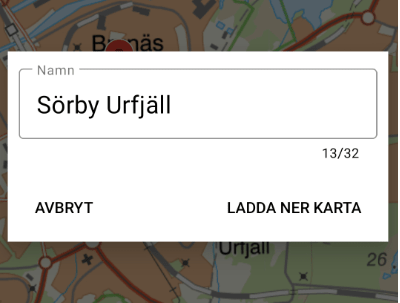
Once you have selected your area, press "Enter name". Now you get to name the map of the area you chose to download. The app provides a name suggestion based on the area centered in the map. Press "Download Map" to complete the process.
If everything went as it should, you can see the downloaded map in a list. You have the option to download several different areas as offline material, all of which will then be available when you lack coverage.
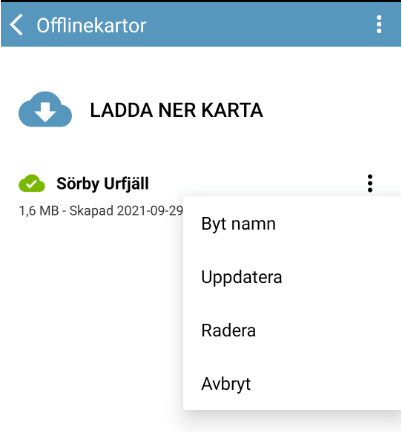
By tapping on a downloaded map in your list, you can see the area that the map covers, highlighted within a purple frame.
If you press the menu button to the right of a saved map, you can edit its name, update the material so that it is renewed if the Land Survey has made changes since you made the download, or delete the map.
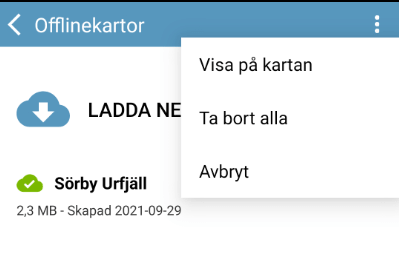
If you press the menu button in the upper right corner, you can choose to show all your downloaded areas on the map. They are then displayed with a purple mark around them. You can also choose to hide all markings of downloaded areas if you previously turned on the function. You can also choose to delete all downloaded map areas.
Legend
When you press Legend, a pdf file opens in the default browser of your device. This shows what the different symbols that appear on the maps mean.

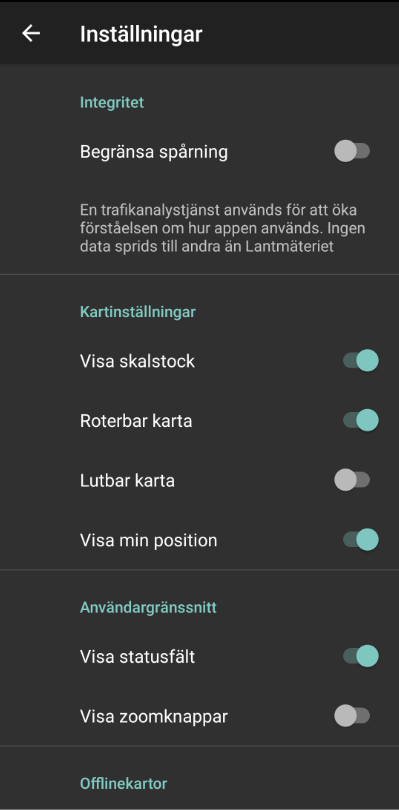
Settings
Here you get the option to choose additional settings of how you want the app to look and function.

Product descriptions
In the product description you can read more about the content in the background map.
Choose one of the following: